Every list in MedITEX Scheduler has several important features:
Sort and filter
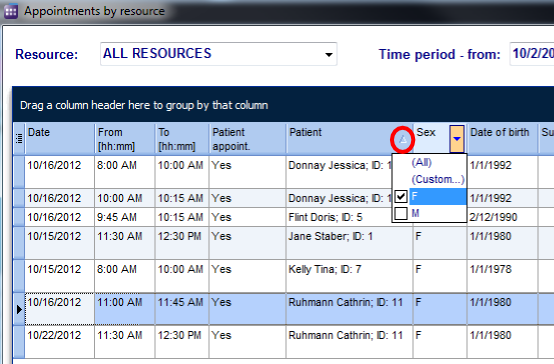
- Clicking on the arrow next to the column header, you can filter the table content by the information contained in that row. Therefore, only the information that was checked will be displayed.
- To sort the list ascending or descending, simply click on the blue header of the desired column.
- For this example, the list is sorted ascending by Patient (red circle) and is filtered by Sex so it only shows female patients.
Hide show columns
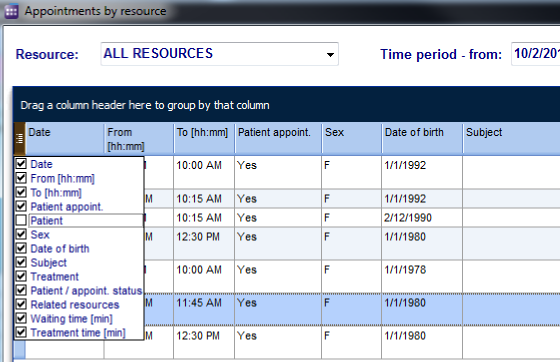
- Some lists have a special button on the left side of the header. This button allows you to hide and move columns.
- For this example, the column Patient was unchecked. So when you compare it with the picture above, the whole column Patient is no longer available.
- To move columns around from this button, simply click and drag the name of a column up and down. Two green arrows will help positioning the column in place.
Arrange columns
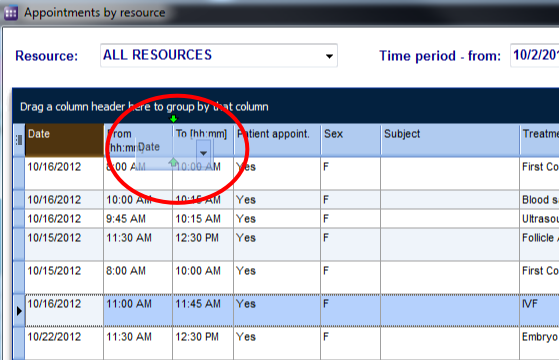
- It is also possible to move columns around the list simply by clicking and dragging. Two green arrows will help positioning the column in place.
Group
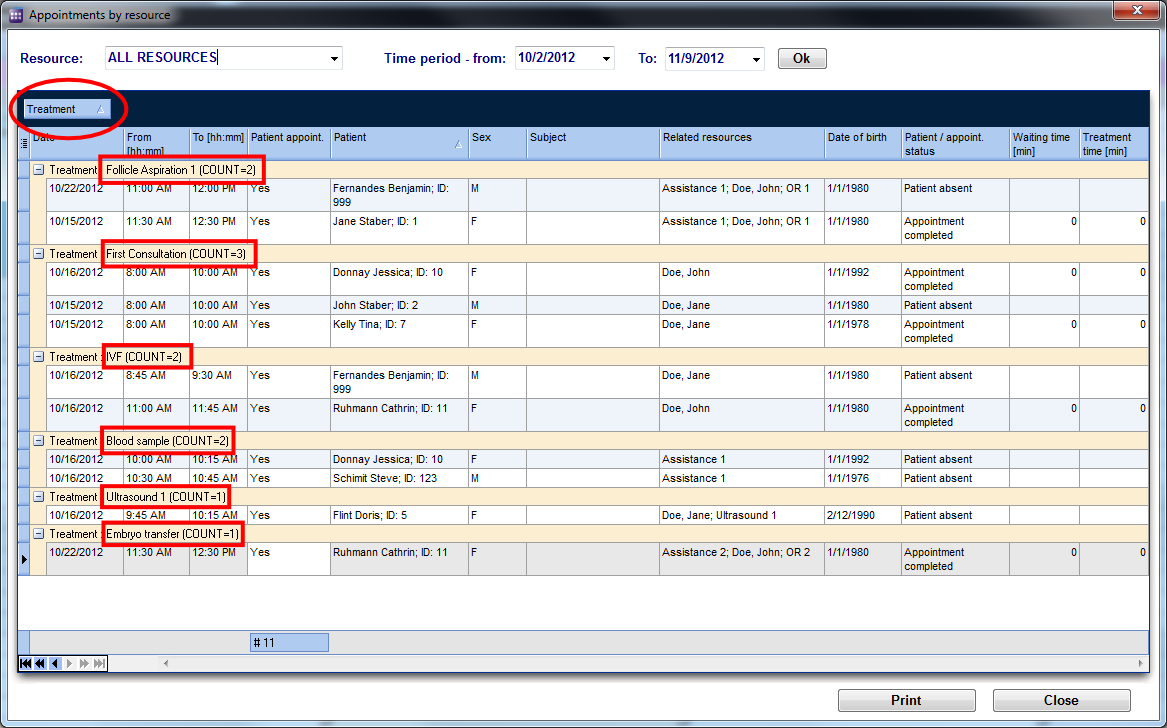
- It is also possible to group the content of lists in MedITEX Scheduler. In order to do that, simply drag a column to the dark blue area on the top of the list. It is also possible to group by more than one column.
- To revert the list to its original form, simply drag the column back in place.
- For this example, the table was grouped by Treatment.
Persistance
One of the biggest advantages of managing lists is that each one is saved individually for a user. So next time you log in, MedITEX Scheduler will display your lists just the way you left them.